
Call menu is an advanced feature best suited for Admins.
In this article, we’ll cover:
What is a call menu?
A call menu is like an auto-attendant, virtual receptionist, or IVR. It lets callers choose options by pressing keys on their phone’s keypad. When they press a key, they follow a path based on their choice. A sound clip plays to inform the caller of the available options. If the caller doesn't make a choice before the time runs out, the call will follow the "Timed out" path.
Filtering spam and robocalls
A call menu can help keep spam and robocalls away from your team. Callers have to press a key before the call reaches anyone, and many automated callers don’t respond to the menu.
What happens to callers who don’t press anything depends on your Timed out path. You have two options:
- Leave the Timed out path empty. The call doesn’t go anywhere, so robocalls that don’t press a key are blocked. This is the strongest option for filtering spam.
- Set a Timed out path, like Send to voicemail. Callers who don’t press a key still get to leave a message, but spam can end up in your voicemail too.
📝 Note: If you leave the Timed out path empty, real callers who don’t press a key won’t reach anyone either. Make sure your recording clearly tells callers to press a key. A call menu doesn’t block specific numbers, and it won’t stop every spam call. For stopping specific numbers, see caller ID step.
How to create a call flow using a call menu
- Find the admin tab
First, locate the admin tab at the bottom left corner of your screen.
- Go to call flow builder
In the admin tab, find the call flow builder option.
- Create a new call flow
Now, click on + New Call Flow to start making your call flow.
- Start the flow
Next, click on the plus icon under incoming call.
- Select call menu
Then select call menu. This is where the fun begins! You can choose a recording if you have one or click + New at the top right corner of this tab to create a new recording.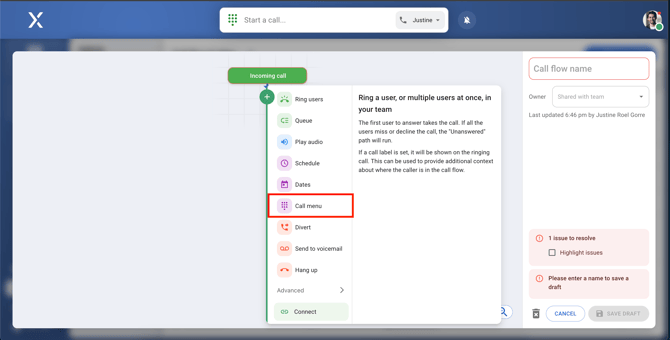
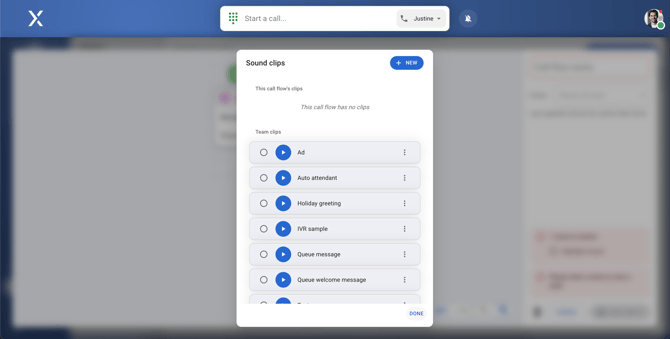
- Set up your options
After you make your recording, you can click add paths and input based on what you instructed in the recording.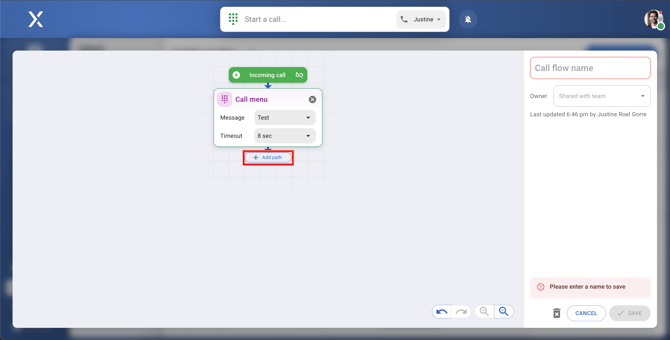
For example, in my recording, I wanted callers to press:
- 1 to contact our receptionist
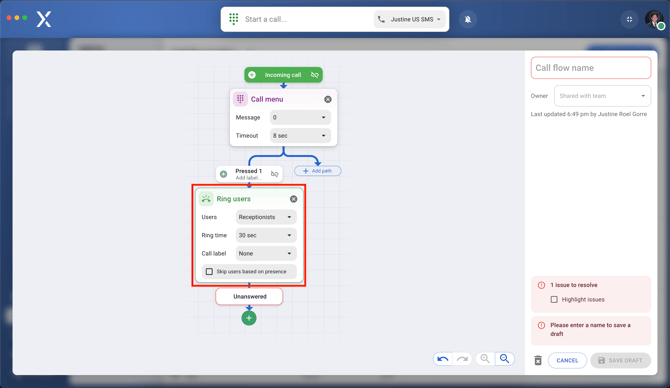
- 2 for support
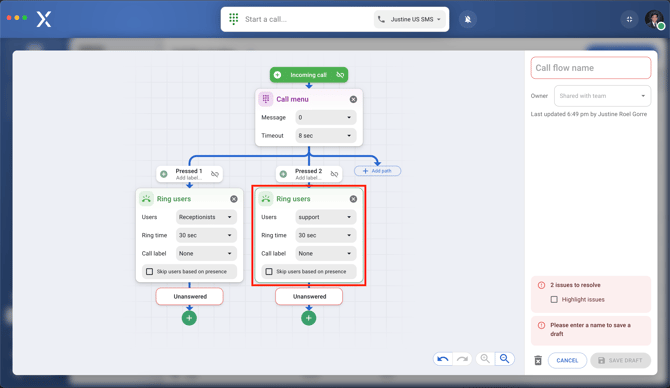
- 3 for the engineering team
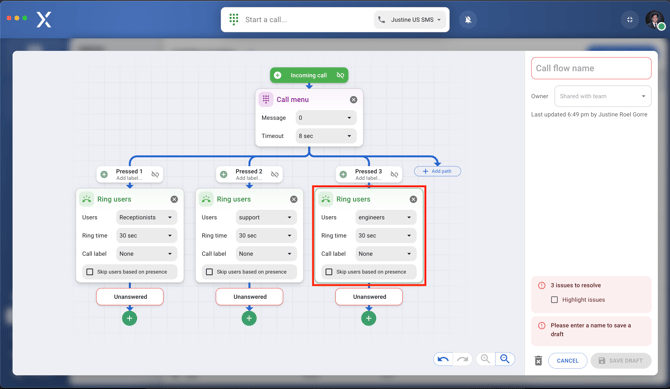
- And when the recording or timer runs out, I want to direct them to my personal number so I can cater to their needs.
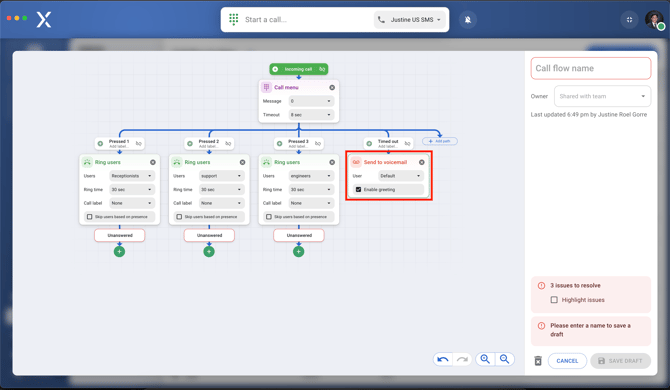
- 1 to contact our receptionist
- Handle unanswered calls
After ringing the users, I want unanswered calls to go to voicemail. To do this, click on the plus icon under ring users and then select click sent to voicemail.
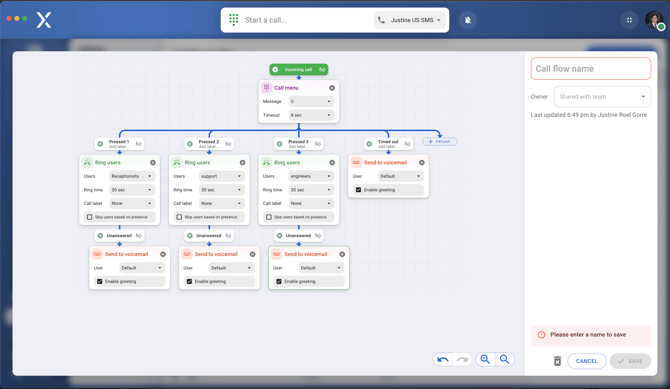
And that’s it! You’ve now learned how to use the call menu step to manage your call flows. This makes it easier for callers to get to the right person or department when they need help.