
In this article, we’ll cover:
Recommended practices
Adding the Caller ID step is recommended to take control of your incoming calls:
- If you keep getting calls from unwanted numbers such as spam callers, patterns, or private numbers, you can add them to the Caller ID phone list and route them to the Match branch to be hung up immediately, effectively blocking spam or irrelevant calls.
-
Use the caller ID step to route calls based on the phone number the caller is calling from. You can send calls from specific phone numbers (or groups of numbers) to a different person, team, or destination in your call flow. This only affects matching phone numbers—other callers will continue through the rest of your call flow as normal.
Caller ID step controls
-png-1.png?width=361&height=288&name=Screenshot%202025-10-03%20at%203-56-30%E2%80%AFPM%20(1)-png-1.png)
- Phone numbers: Enter the phone numbers or the start of phone numbers you'd like to match, for example:
- '+64' to match all New Zealand phone numbers, or
- '+61 4' to match all Australian mobile phone numbers.
- To enter multiple numbers at once, include a comma between each number.
- Also match private numbers: Include hidden or unknown numbers and redirect them to a specific path. Most effective to filter out spam callers.
- Match: This branch sets where the numbers from "Phone numbers" are routed.
- No match: This branch redirects any number that doesn't match the patterns or numbers listed under "Phone numbers.”
Example call flow
Here's a simple guide on using the caller ID step:
-
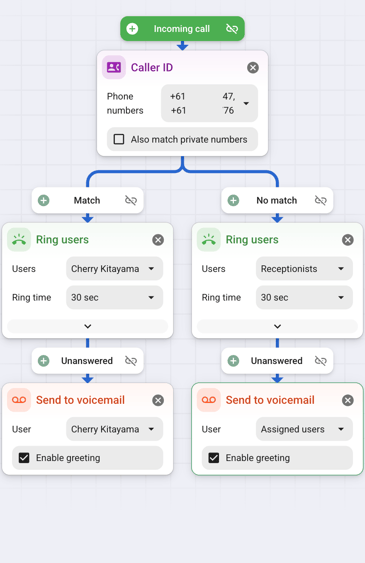 A phone call comes in
  :
:- Specific numbers (+61 *******47 or +61******76):
- Ring Cherry for 30 seconds.
- If unanswered, the phone call is sent to Cherry's personal voicemail.
- All other numbers:
- Ring the receptionists group for 30 seconds.
- If none of the users answer, the call is sent to the number's default voicemail.
- Specific numbers (+61 *******47 or +61******76):
Guide to create this flow:
-
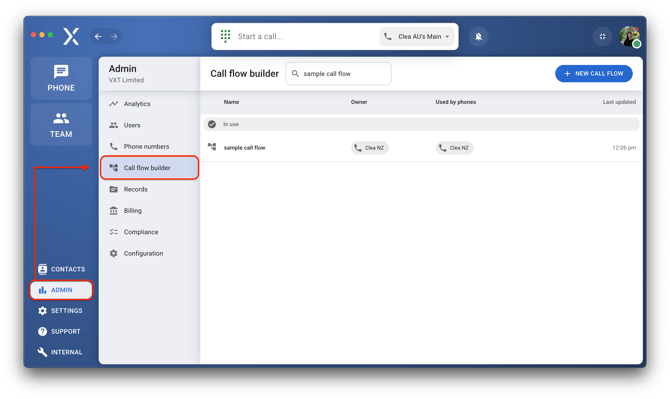
Go to the Admin tab and open the Call flow builder.
-
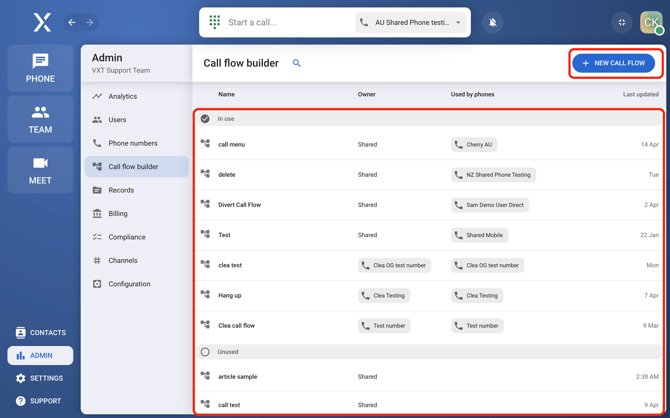
Create a new call flow or select an existing one you want to edit.
-
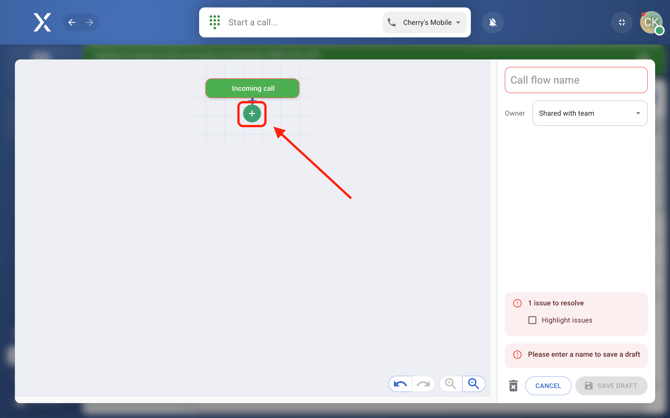
Once you’ve opened a call flow, click the + icon under Incoming Call.
-
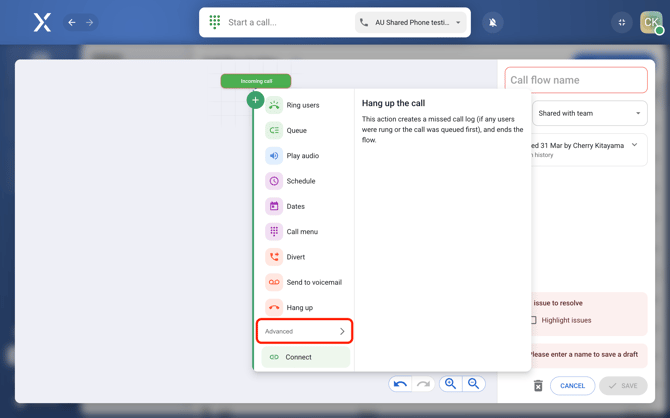
Click the advanced section.
-
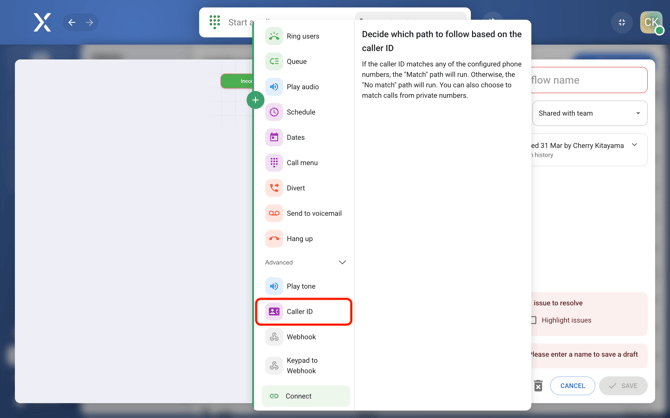
Select the Caller ID step.
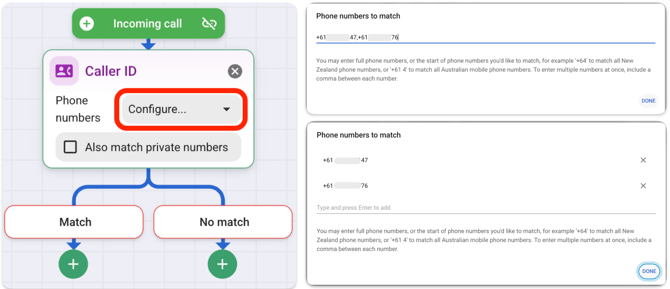
- Click configure and enter the phone numbers you'd like to isolate — in this case, +61 *******47 and +61******76 — and hit done.
- Under Match:
- Click the + icon and select the Ring Users step.
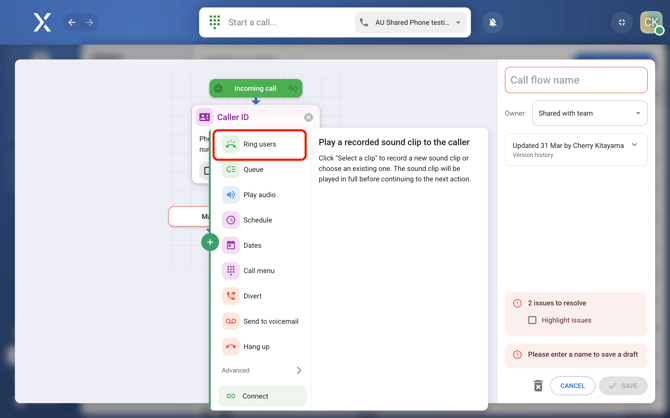
- Select the user to receive the call — here, it's Cherry.
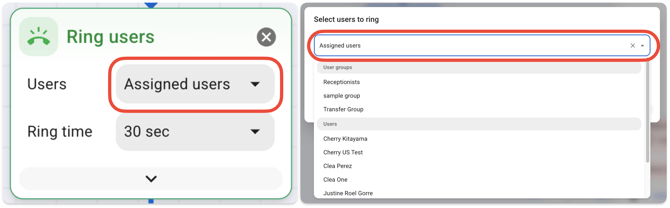
- Select the user to receive the call — here, it's Cherry.
- Hit the + icon and add send to voicemail.
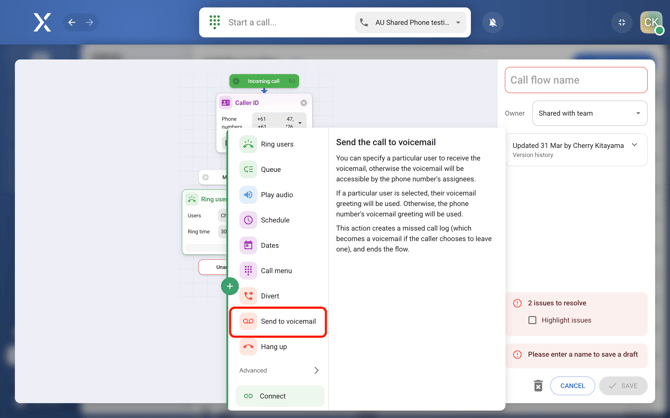
- Enter a specific user to send the call to their personal voicemail.
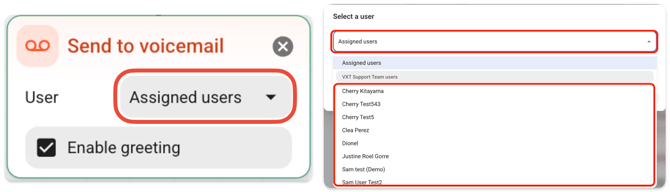
- Enter a specific user to send the call to their personal voicemail.
- Click the + icon and select the Ring Users step.
- Under No match:
- Click the + icon and select the Ring Users step.
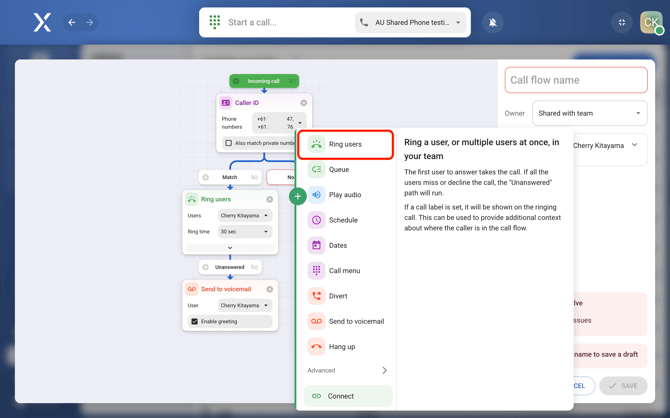
- Choose the user or group to receive the call — in this flow, it's the receptionists group. Here's how to add users to a group.
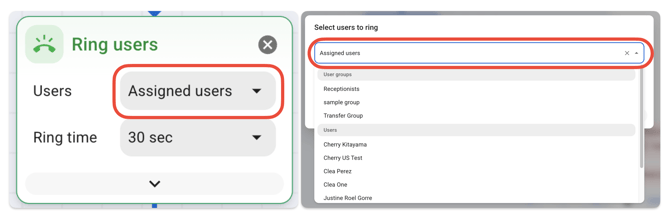
- Choose the user or group to receive the call — in this flow, it's the receptionists group. Here's how to add users to a group.
- Hit the + icon and choose send to voicemail.
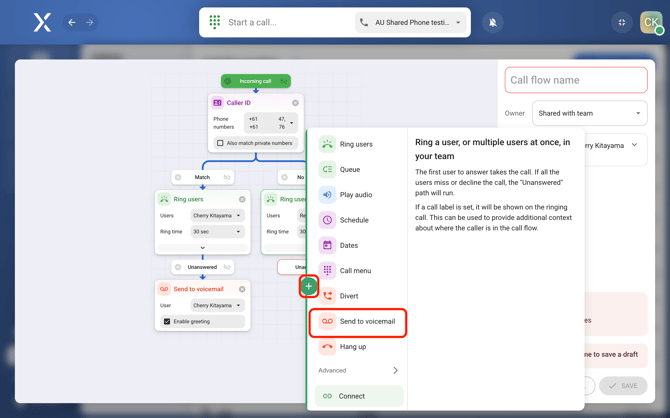
- Leaving it at 'assigned user' means that calls will go to the number's voicemail, accessible to its assigned users.
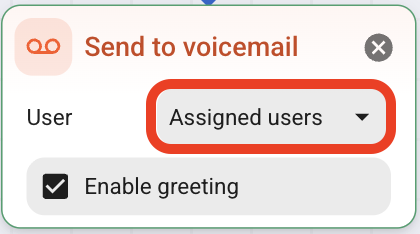
- Leaving it at 'assigned user' means that calls will go to the number's voicemail, accessible to its assigned users.
- Click the + icon and select the Ring Users step.
Remember to name your call flow and hit save!