Inviting and managing users is an advanced feature to be performed by Admins or users with the Manage Users permission.
- Managing users and their permissions
- Inviting new team members
- Organizing your team into Groups
- Configuration
- Adding your profile picture
To manage your team members, click on Admin in the bottom left-hand corner of your screen, then navigate to the 'Users' page.
Managing users and their permissions
On the Users page, you can manage a user's profile by clicking on them. On their profile, you can manage the user's permissions, see what phones they are assigned to, and review the groups they are organized in.

Inviting new team members
- Click the Invite People button in the top-right-hand corner.

- Input the email address of the person you want to invite and select a role for the user. Review invitation > Send invitation

Invitations can be managed just like users. You can assign invitations to phone numbers in advance of the invitations being accepted. That way, you don't have to remember to return and assign their phone after they have created their account.
If you invited a user but they didn't receive an invitation via email, don't worry! Users don't have to receive the invitation by email to create their account and join your team.
Organizing your team into Groups
You can organize your team into Groups, which can be used in other areas of the app, like building call flows that ring a specific group or reviewing analytics by group.
Click on the Groups section of the Users page. 
Configuration
Configuration allows you to enforce policy across your entire account so that compliance is easy to manage.
For example, if the policy at your company is to only record incoming calls, and never outgoing ones, you can enforce those rules on the Configuration page.

Adding your profile picture
- Go to the Settings on the left side of the app.

- Select the Account tab.

- You can also find the Settings after you click your initials in the top right corner, and another option bar will pop up to let you access the Settings option.
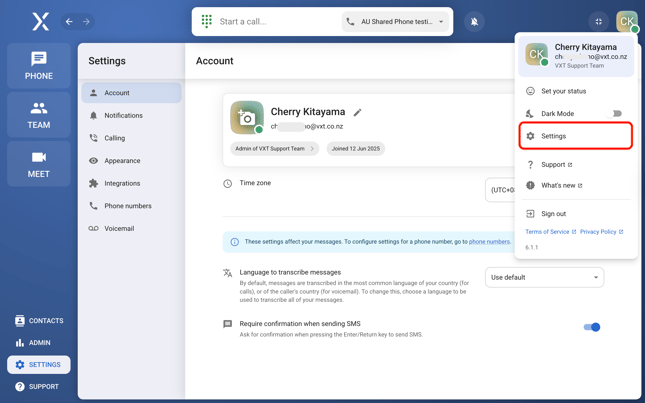
- Click the camera icon.

- Drag your photo into the prompt or click the prompt area to choose a file from your computer.

- Use drag or zoom to position the photo within the frame to your liking.